The following guide is to help the deployment of an Ping Identity OpenID configuration as the authentication provider for Pyramid. Ping is not that different to generic OpenID, but there are some key aspects that are unique.
Note: This feature is only available with Enterprise licensing.
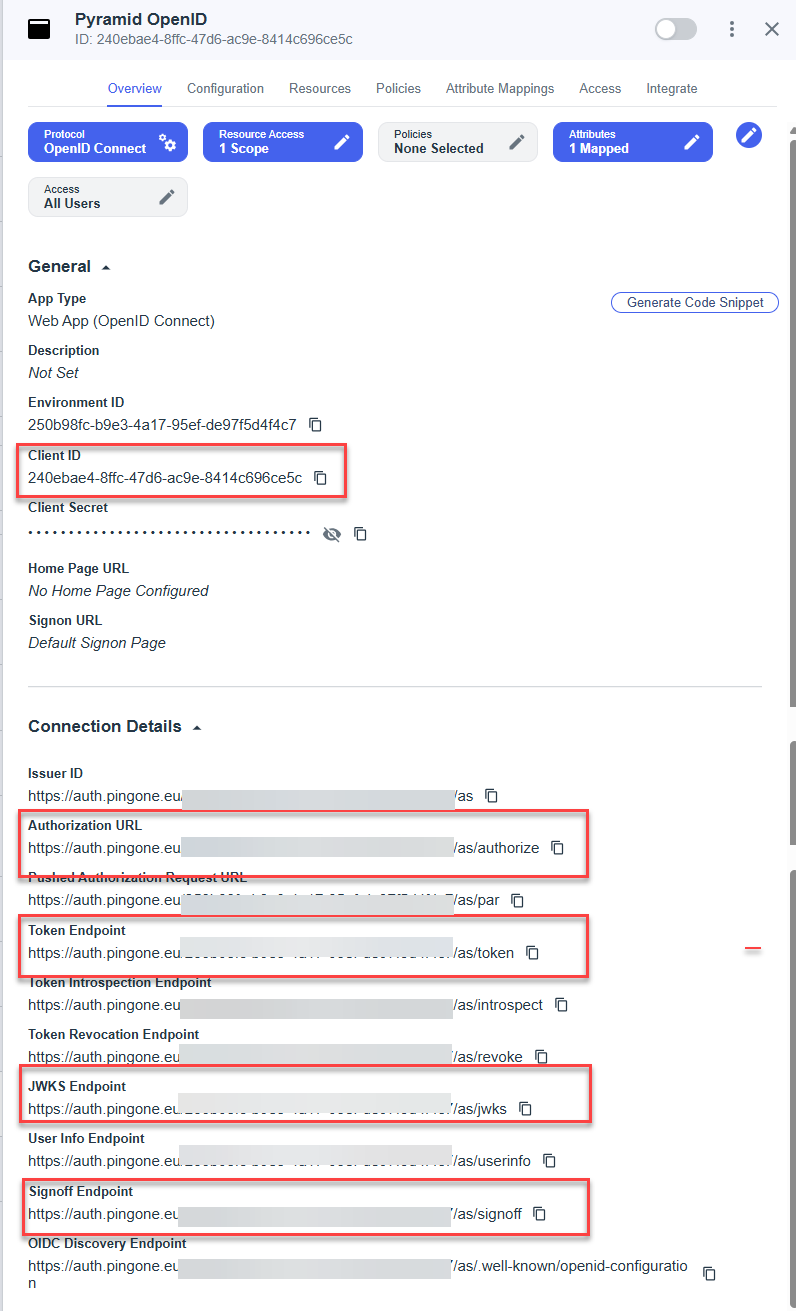
Ping Identity OpenID Setup
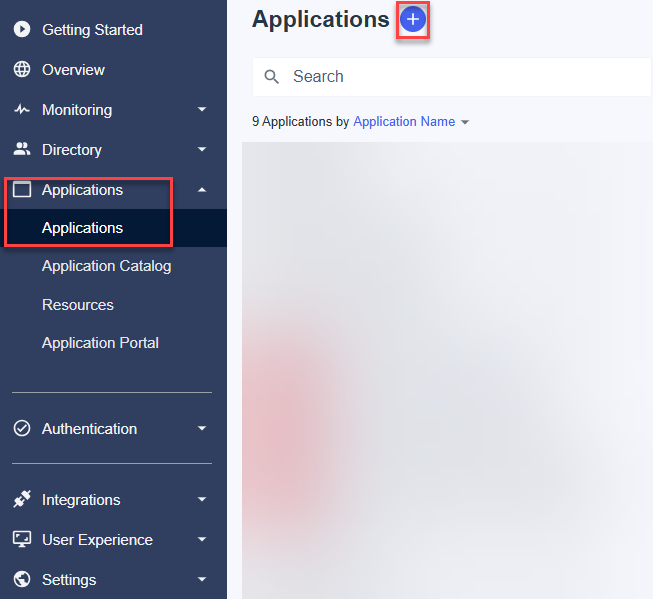
Add a new OpenID Application
Go to Applications and add application:
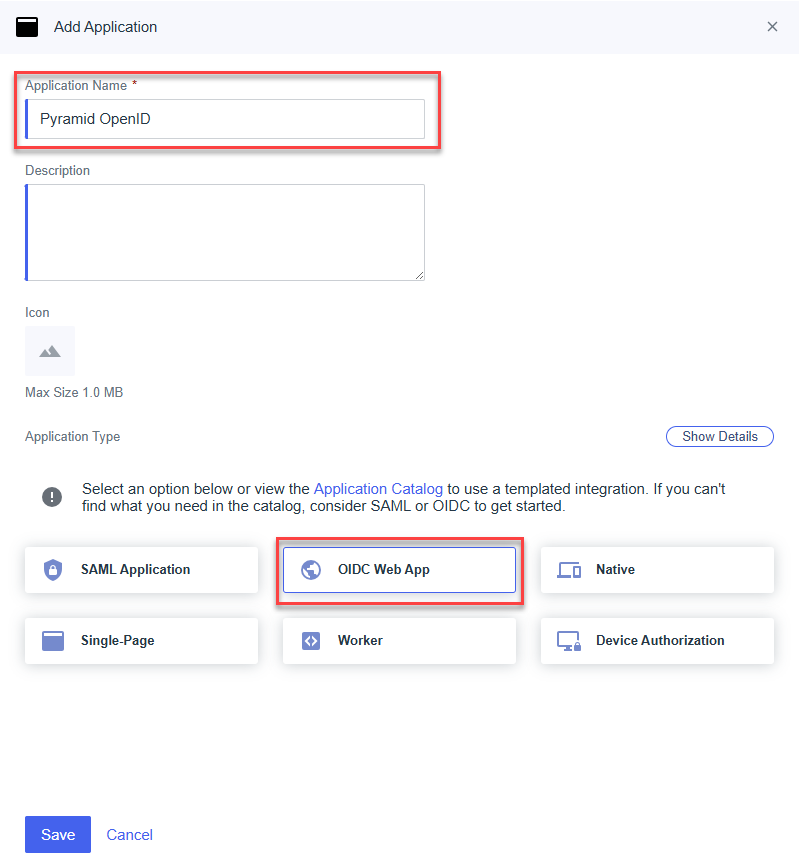
Give the application a name. Then select OIDC Web App.
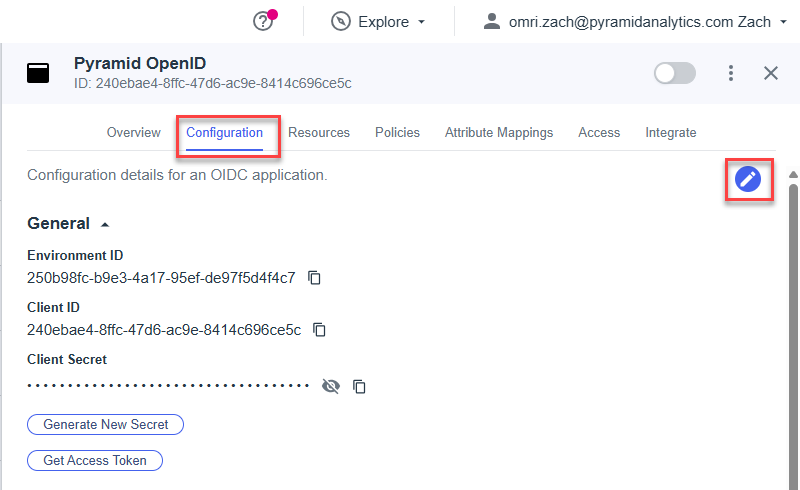
Configuration
On the newly created app, go to Configuration and click Edit.
Enable the following OIDC Settings
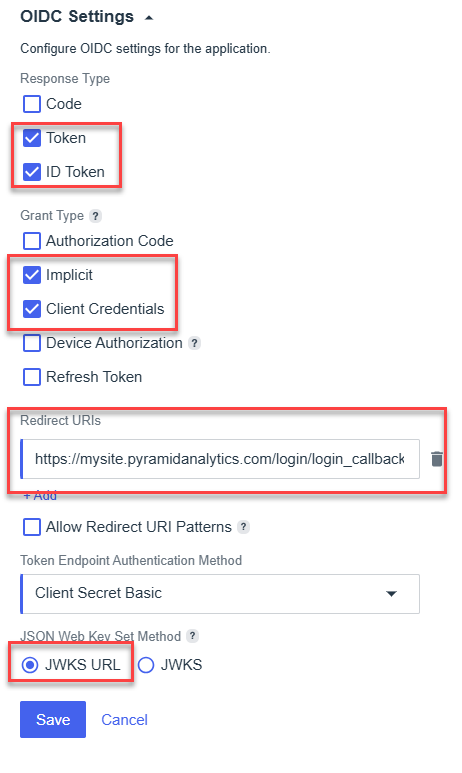
The redirect URIs are the URLs for the Pyramid instance.
Overview and Settings
Open Overview and then save the following settings to configure Pyramid
Setting the provider up in Pyramid
- In the Admin Console, click Security > Authentication.
- From the top-right of the page, click Change Provider.
The Authentication Provider page opens with the details of your current Authentication Provider displayed.
The Change Provider page opens. You will copy the details of your new authentication provider into this page, starting by selecting your Provider.
Take all the setup information from the previous steps above to fill in the form:
- Endpoint URL: OAuth 2.0 authorization endpoint (v2)
- Client ID: Client ID
- Redirect URL: Redirect URI (https://mypyramidsite.pyramidanalytics.com/login/login_callback)
- Logout URL: Signoff Endpoint
- JSON Web Keys URI: JWKS Endpoint
Once all the fields are filled, click Test, copy the ping_login_name from the pop up and copy it into the External ID field.
User Provisioning Setup
The Ping Identity OpenID provider can be used for auto provisioning in Pyramid. If you want to use auto provisioning, you will need to set up the app and then specify its settings on the Provider Provisioning tab. For more information, see Ping User Provisioning.
Save your changes
Click Apply to start the provider change-over process. At this stage, the existing users (attached to the previous authentication system) need to be converted over.
Admins will be prompted to either:
- Delete all existing users and their local content. When users are deleted by this process, all their private data (the discoveries, publications, and so on that are stored in their My Content Folder) is "soft deleted." Soft deleted files are moved into the Deleted users content folder and can be restored by an admin if needed.
- Convert old users to the new provider (through the user conversion wizard), and keep their content
Since this exercise cannot be rolled back once the changes are committed, admins need to step through this exercise carefully.
- Click here for a detailed explanation and walkthrough of User Conversion